
Magical Mess-Making + Husband Holidays = KABochons!!!
In a recent post on Watch Me Create about the books currently sitting next to my big comfy chair, I swore I would learn to bezel set, even if it killed me. I ordered all the materials more then a week ago and they finally made their way here in my house yesterday.
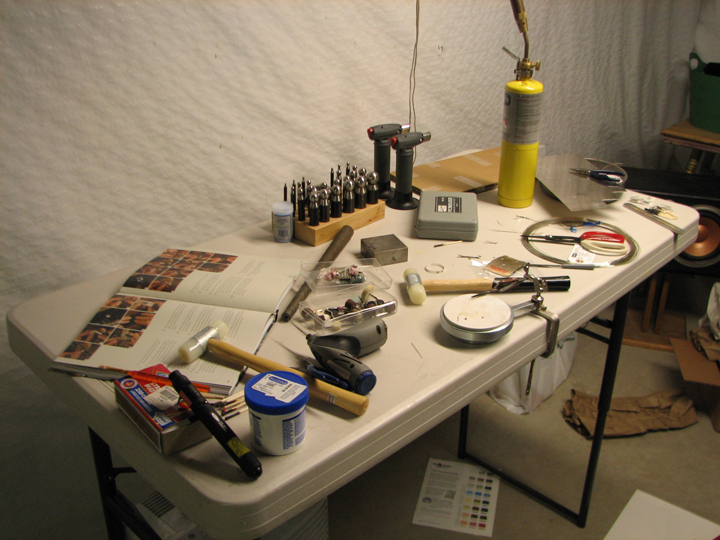
It was a nutty day yesterday... doctors' appointments, swim classes, hair cut appointment, baseball practice, and a sleep over! I was running like a crazy lady. Thankfully though, Ron, in his infinite wisdom, knowng how rough the week was on me, took the day off work to help me out. In the middle of the day, I squealed with joy at the UPS guy bringing me my bezel setting box of goodies. And Ron was happy to let me stow away in the studio for a couple hours. He even brought me food while I was working away!
I quickly ripped open the box (you can see the packaging all over the floor in the photo above), I went nuts rummaging through storage boxes to find missing supplies I knew I already had somewhere, and set to work.
What.A.Learning.Experience.
Here is what I have learned so far:
1) Solder needs HEAT, so I am returning the crappy little "pencil" torch that I paid $41 for and I am looking for something hotter. Yesterday I ended up using my trusty hot head to solder, but that flame is big and bulky, and hard to control.
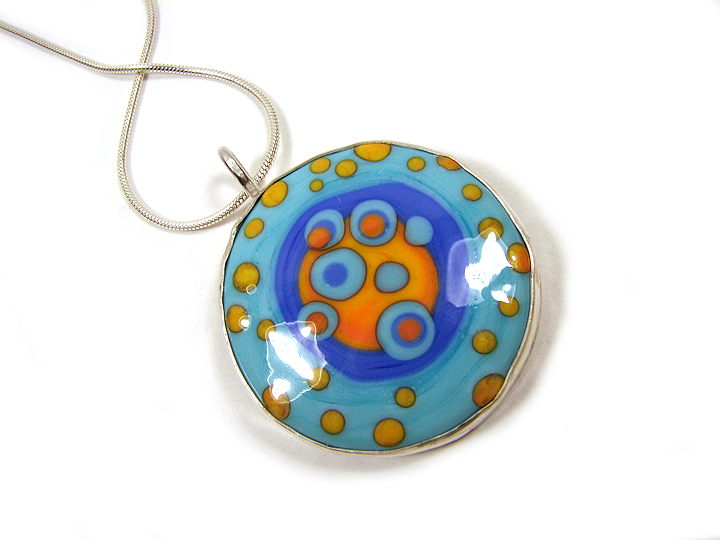
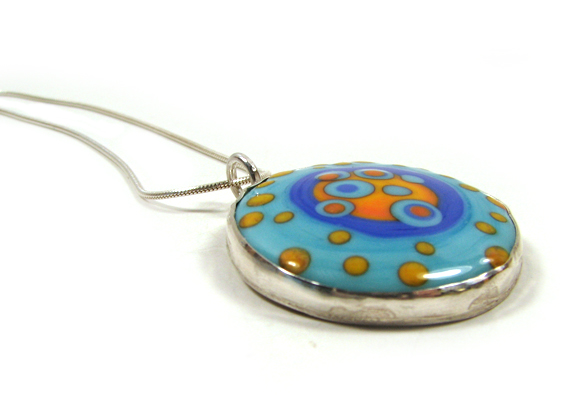
2) Bezel wire melts if you get it too hot with your hot head torch, lol. For those of you not familiar with bezel setting, basically you build a "cup" (bezel) for a bead/cabochon from metal. First I built the frame that wrapped all around my bead (from bezel wire), then I soldered that frame to a piece of sterling sheet metal...
3) I need better saw blades and dremels are good for more then just cleaning beads! After I soldered the bezel wire to the sheet metal, I needed to saw away the excess metal and file/shape/smooth/sand the edges around the outside edge of the bezel. I went though 8 jewelry saw blades before pulling out my dremel. HA!
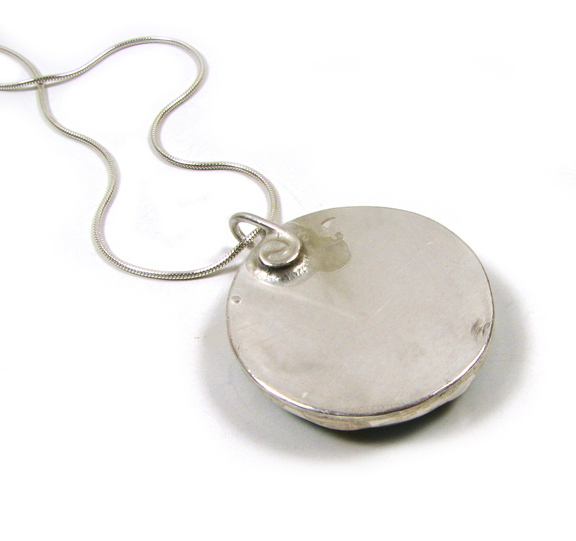
4) Use less solder. You can see in the "back view" of my new bezel pendant that there is way too much solder attaching the bail to the back of the sheet metal. Oh well, I am learning.
I don't think these are ready to sell yet, I need to work on my technique... BUT they do make for a good "Random Act Of Kindness". I gifted a purple one of these to Marcia yesterday afternoon! Enjoy it Marcia!!
Oh, and before I go enjoy this G.O.R.G.E.O.U.S. weather we have in Rochester this weekend, I want to tell you all thank you so much for your comments on Thursday's post. It is a wonderful support to know I am not the only ragging lunatic of a Mom, lol. The kids head back to school on Tuesday... I am looking into summer camps... and I'll be alright. You are all appreciated so much... I hope you know that. Thank you.


12 comments:
Great job Kerry!!!! What book are you using...looks really interesting! Will your hand held butane torches work?? Or only your big boy there? Ooops, too many questions! Sorry! You did an excellent job lady for it being your first one, I am truly impressed! Keep up the great work! Take care!
Warmly,
Leslie
you can do it kerry...you can do it...it's lovely...
kerry, i think this piece is beautiful! the cabochon is gorgeous too...have you ever considered selling glass cabochons? take care, lisa d., portland, oregon
Kerry..you've done it! You've created your KABochon!! Was it hard? Boy did you have to pull out all kinds of tools for this one. Sounds like you had a lot of fun experimenting!
Hey Kerry. It looks great!
You might want to check out the Smith Little Torch. It looks small but is pretty mighty for jewelry sized stuff. I got one (after having an acetelyne one that needed tanks and a too hot flame) and it works great. I also have it hooked up to an extra concentrator and my existing propane gas line.
Hi Kerry,
I started soldering about 6 months ago, and since I travel 100% of the time, my torch set up had to be portable and safe...I got what I needed at Contenti, and I love it, love it, love it! Here is the link:
http://contenti.com/products/soldering/114-473.html
The number 4 tip is great for what you are doing...and using the little portable gas tanks is great since you don't have to mess with the regulator...great work...just keep practicing..it is worth it in what you will be able to create now!
Kerri, I love your glass work & your first bezel setting is really nice!! Like the other poster I too use a Smith Little Torch for metal work, oxy/propane set-up which may be too much if you only want to make bezels. Something I didn’t see on the work bench (forgive me if I missed it) but is very useful to me in bezel work is a burnishing tool. I use a curved one which creates an even flat surface between the metal & the cab. Keep it coming with the new work!
http://www.contenti.com/products/stone-setting/150-062.html
Lynn J, Nashville, TN
My first bezel experience was horrific, so I'm proud of you!
BTW, what is that thing you have c-clamped to your table?
I love it. Please put some up for sale
OMG! I love love love this pendant. I can't wait until they're up for sale!!!!
Kerry,
I love my RAK! I wore it all weekend and received many compliments and inquiries on where they could purchase one. I found the greatest light blue shirt on sale at Kohl's that makes it pop! Thank you so much.
Marcia
we have a woman in my bead group whose father does this kind of work for her, he's 82, so if he can do it, you can too. He started out with many challenges. he's worked thru them and manages to make her lampwork look stunning on more than one occasion.
Post a Comment